I’ll start with some basics of composition and framing that might improve all of your photos, not just those of your dog. Judging by the majority of images I see on Facebook and elsewhere, most people could use plenty of help in this area.
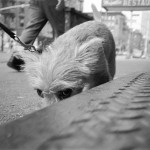
1. Think about the frame through which you’re shooting. The first sign of an inexperienced photographer is when they hold the camera, as always, in a horizontal orientation, aim it directly at someone’s face and shoot. Unless they’re very close, this results in lots of empty space on the top and both sides, and cuts off the legs (which could be intentional, but usually isn’t). Train yourself to think about your subject in the context of the frame created by your viewfinder or screen, and experiment with changing the orientation and direction as you aim.
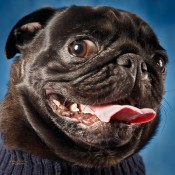
2. Get Close. Get off your armchair and move right up to your dog. Your subject doesn’t have to fill the frame, but it’s usually best, unless you have props or a background that add to the effect you’re after. Framed well, full-body shots are nice, but you’ll also want to try some closeups-even extreme closeups-with the entire frame filled with just your dog’s loving face.
3. The eyes have it. For the most part, you’ll want to focus on the eyes. That doesn’t mean they have to be in the center of the photo, though. With most modern cameras, that means aiming at one eye-and it’s usually best to focus on the nearest one-and pressing the shutter partway down until you hear a beep or see a little light come on (or both. The eye should then be in focus), then re-aiming before pressing the shutter the rest of the way down. It takes a little practice. You might have to consult your camera manual for pre-focusing instructions for your model. Later I’ll discuss the all-important subject of light on those eyes.
4. Consider background distractions. Whatever is behind your subject can enhance the feeling of your photos, but most likely it contains mostly distractions. Later on we’ll talk about minimizing those through limited depth-of-field. For now, just train yourself to be aware of the background and move yourself or your dog to make sure there are no branches or telephone poles sticking out of his head, no unsightly or busy details that you might otherwise overlook until it’s too late. They’re easy to miss when you’re focused on the dog, but all too prominent in the final photos.
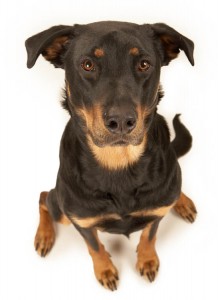
5. Find a contrasting environment. I’ll discuss later how to get great photos of black dogs against a black or very dark background. But it’s usually easier to stick with a contrasting scene-dark for light colored dogs, light for dark colored dogs-whenever possible. This simple step helps make your dog “pop” from the backgound, and contributes to a sense of overall sharpness. If you have a black dog and white walls, you’re in luck. If your dog blends into your own environment, you may want to try your photography somewhere else, or introduce temporary sets with some kind of fabric, such as blankets or sheets that aren’t too wrinkled.
If these steps seem elementary to you, don’t worry. We’ll get more advanced in further posts, including many that relate specifically to photographing dogs. Next up: in part two, I’ll discuss the basics of making light work for you, including simple tricks to turn “impossible” lighting into “magic” lighting, and making the texture of fur visible in your photos
Sign up for my infrequent phoDOGraphy newsletter. You’ll be sure to receive all of my phoDOGraphy pet portrait secrets, as well as news and opportunities of interest to anyone who owns a dog, especially in New York.
Happy shooting!


